For experienced WordPress users, adding an image to a blog post may not be a big deal, but to those new to WordPress, the user interface might seem a little complicated. Latest versions of WordPress now let you set up multiple images, galleries, and yes, you can add a single image to a post as well. Keep reading to find out how to add images to your blog post.
Step 1 – Open up the Image Block
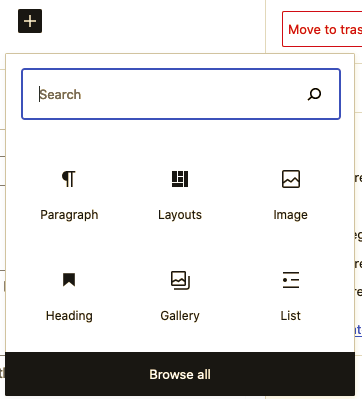
From within your post editing screen in WordPress, click the ‘+’ and select ‘image’. If the image icon doesn’t show up like in the screenshot below, just type in ‘image’ into the search field and it will appear.
Bonus Tip
Before uploading the image change its name to add SEO value.
Step 2: Select Your Image
From here, you can choose to upload an image from your computer, add an image from your current image library, or insert an image from a URL (a website address).
Click on ‘Upload’ to add an image from your computer, and then navigate to the image you want to include in your blog post. Click ‘open’.
Step 3: Editing Your Image

From here, you can choose to align your image, use your image as a link, crop it, or add text over the top of it. You can also choose to add a caption which is the text underneath the image. I always like to add a caption because it provides a description of what the image is.
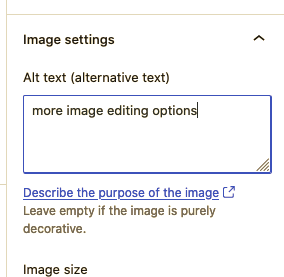
If you click on your image, in the right side of your screen should appear more options. The most important option here is the Alt Text section. It’s important to provide text here that describes your image so visually impaired users of your site who use screen readers can understand the image.
So there you have it! By following this step by step process you’ll successfully be able to add an image to a blog post in WordPress, align it where you want, and ensure visually impaired users understand what the image is about. In the next post about images we’ll look at adding more than one image and additional image editing options.

Lee Smith
Nashville SEO Consultant
Lee is an experienced Search Engine Optimization professional having 15+ years of experience and creates content to help website owners succeed with SEO and WordPress.